
I love Pinterest, as much as the next person. It is such an amazing place to find recipes, workouts, crafts and even travel ideas. But, there are times when it can be overwhelming because there are SO many blogs and SO many ways to do things. Pinterest craft fails are also something that happen in my house quite often.

I am not typically a glitter person, but I love the idea of taking a vase or a wine bottle and adding some bedazzle onto it. I think it would completely transform a party if done tactfully, and it seemed so easy. I wanted to do a few test runs before the real deal needed to be completed. Through all the blogs and articles, I determined there are two main ways to do it. Use double sided crafting tape or use an adhesive of some sort along with painters tape to achieve a straight line.
I am not typically a glitter person, but I love the idea of taking a vase or a wine bottle and adding some bedazzle onto it. I think it would completely transform a party if done tactfully, and it seemed so easy. I wanted to do a few test runs before the real deal needed to be completed. Through all the blogs and articles, I determined there are two main ways to do it. Use double sided crafting tape or use an adhesive of some sort along with painters tape to achieve a straight line.
On hand I had Mod Podge, glitter and of course painters tape. I went to the store to find some double sided craft tape and clear sealer.

Here are my findings:

Here are my findings:
Double Sided Craft Tape
Process -
I used a vase that I had handy and an empty glass bottle that my Squalene comes in (if you have not tried Squalene for your face, buy it right now). Clean the vase thoroughly. Add on the tape to the vase, in whatever design you want.

Once all of the tape is applied, remove the top red layer to expose the stickiness. Apply glitter generously and press down on the tape areas to make sure glitter sticks. Use a small brush and brush away the excess glitter that is not attached to the tape. Spray the clear sealant to protect the glitter from coming off.

Pros:
- The tape does not have to be perfect. There can be air bubbles or slight issues without it being noticeable.
- The tape is easy to apply and you have some give, if you need to correct something.
- Quick option since you are just applying tape and adding on the glitter.
- Brush was easy to use and got rid of all the excess glitter.
- Very clean look since it has straight lines, and since the tape comes in all different sizes you could do many different thicknesses or designs.
Cons:
- The tape was expensive! I felt like I needed to be very conservative with the usage. You would also have to buy multiple different widths if you wanted to achieve certain looks. With 40% off coupon, I paid $2.99 for this roll.
- I do not like how you had to spray the whole vase with the sealant. It made the vase seem cloudy. I am not sure of any way around this, other than taping the unglittered areas, which was be a lot of work.
- This took some time for me to do. Double sided tape can be frustrating, so it took me about 15 minutes for the one vase.

Glue Application
I used a wine and beer bottle for this option. Heat bottles in an oven at 350°, for ten minutes. Using oven mitts, remove the labels while bottles are hot. If there is any residue, wait for bottles to cool and clean with a sponge.
Process-
Process-
Use painters tape and tape off the area that you want to apply the glitter. Make sure the tape that is bordering the glitter area is completely flat against the glass. Apply Mod Podge generously all over the glitter area. Apply glitter. Press down on the area with your finger to make sure all the glitter is glued down.

Apply the sealant to the glitter area, make sure to only apply on the glitter and not that area that is bare (without tape). Remove tape immediately.

Apply the sealant to the glitter area, make sure to only apply on the glitter and not that area that is bare (without tape). Remove tape immediately.
Pros:
- I felt like the coverage was very thick with the glue.
- I love that the sealant is only applied to the glitter area, since you can leave the tape on while spray painting.
- The whole process was very quick, about 5 minutes start to finish.
Cons:
- If you have to purchase the painters tape, this option could be expensive. But in most cases masking tape or package tape would work too. Painters tape will give the most precise line.
- My fingers and surrounding areas did get a bit more glitter and glue on them, since I used my fingers to press down the glitter. Using a brush would probably not work with this option because it would take off too much of the glitter.

Outcome:
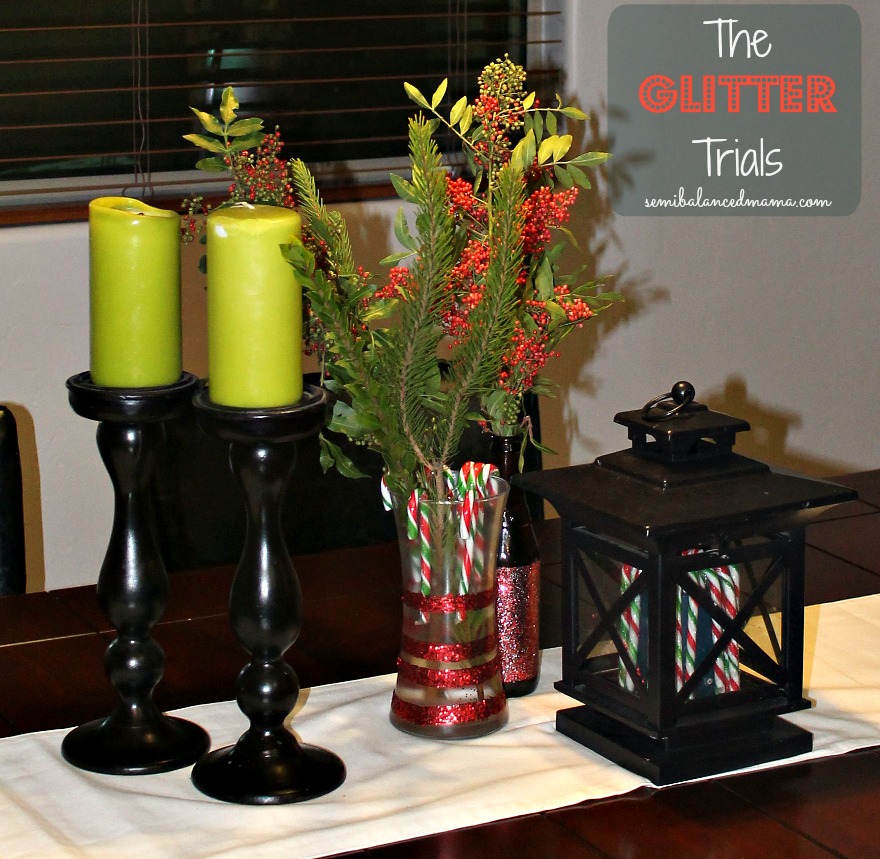
Even though I like the clean look of the tape, I think I like the glue application better. I had all the supplies I needed at home, so I would not have had to purchase anything. Some people may find working with painters tape annoying, but I don't mind it and I think it makes a nice line. The craft tape option would be better if there was a way to only apply the sealant to the glitter area, so it wouldn't make the hazy look. So if you know the secret, let me know. They still looked gorgeous and I ended up putting flowers in the vase, so the haziness was a bit hidden. Obviously these trials happened around Christmas time, and I got so many comments on them throughout the season.

Check back in a few weeks for the BIG project that I was preparing for! I am so excited to share the party with you!
Happy glittering,

Tweet


Check back in a few weeks for the BIG project that I was preparing for! I am so excited to share the party with you!
Happy glittering,


Nice job! Glitter can be a pain, but the end result is worth it. I did something similar with my iphone chargers :)
ReplyDeleteVery cute! I love both of them, but if I was going to give it a try, I would probably use the glue application. Thanks for sharing!
ReplyDeleteI love the glitter with the frosted glass! It would be so cute for holidays!
ReplyDelete