Showing posts with label DIY. Show all posts

Festive July 4th DIY Centerpieces!

 Can you believe it is almost time to celebrate our nation's birthday? I can not believe the month of June is almost over and we are getting ready for cookouts, fireworks and family time! I am all about quick and easy projects to transform a party. Last year I posted these easy DIY centerpieces and they were a huge hit, so I am bringing them back. Chances are you have everything you need right in your pantry for this project and if you have little hands that love projects, make sure to enlist them for some summer fun!


red,white, and blue

Ingredients:

Vinegar
White Rice
2 Small Tupperware Bins
Red Food Coloring
Blue Food Coloring

Directions:
Measure 1 cup of rice, place in Tupperware.
Add 1 tbsp vinegar and about 12 drops of food coloring. 


SHAKE, SHAKE, SHAKE! I enlisted some very cute help!


kid approved DIY

Spread out the rice onto the cookie sheet, allow to dry. I used foil on mine so I wouldn't have to clean up blue and red cookie sheets! I also popped mine into a fridge to expedite the drying. 

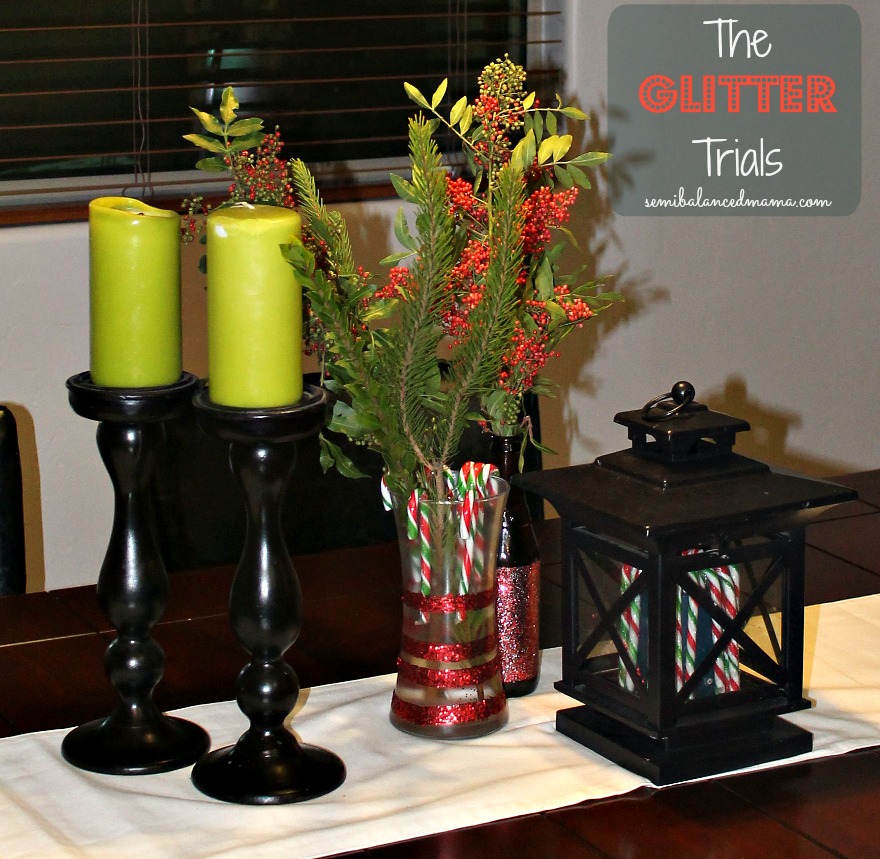
Wait about 1 hour and start layering! I decided to put little candles into the mason jar, along with the rice, I think they will be perfect outside!


When you are done decorating for the season, throw them in a bin and have some sensory fun! We love to have trucks and ping pong balls in the rice, but the possibilities are endless. Things can get a bit messy so having a sheet under the bin is a must! 


I love a fun DIY! Hope you have as much fun making this as we did! 
Happy July Fourth!

DIY

Happy Diy'ing,


Vote For Me @ The Top Mommy Blogs Directory


the glitter trials

I love Pinterest, as much as the next person. It is such an amazing place to find recipes, workouts, crafts and even travel ideas. But, there are times when it can be overwhelming because there are SO many blogs and SO many ways to do things. Pinterest craft fails are also something that happen in my house quite often. 


I am not typically a glitter person, but I love the idea of taking a vase or a wine bottle and adding some bedazzle onto it. I think it would completely transform a party if done tactfully, and it seemed so easy. I wanted to do a few test runs before the real deal needed to be completed. Through all the blogs and articles, I determined there are two main ways to do it. Use double sided crafting tape or use an adhesive of some sort along with painters tape to achieve a straight line. 

On hand I had Mod Podge, glitter and of course painters tape. I went to the store to find some double sided craft tape and clear sealer. 


Here are my findings:

Double Sided Craft Tape 

Process - 


I used a vase that I had handy and an empty glass bottle that my Squalene comes in (if you have not tried Squalene for your face, buy it right now). Clean the vase thoroughly. Add on the tape to the vase, in whatever design you want. 


Once all of the tape is applied, remove the top red layer to expose the stickiness. Apply glitter generously and press down on the tape areas to make sure glitter sticks. Use a small brush and brush away the excess glitter that is not attached to the tape. Spray the clear sealant to protect the glitter from coming off.


Pros:
  • The tape does not have to be perfect. There can be air bubbles or slight issues without it being noticeable. 
  • The tape is easy to apply and you have some give, if you need to correct something. 
  • Quick option since you are just applying tape and adding on the glitter. 
  • Brush was easy to use and got rid of all the excess glitter. 
  • Very clean look since it has straight lines, and since the tape comes in all different sizes you could do many different thicknesses or designs. 
Cons:
  • The tape was expensive! I felt like I needed to be very conservative with the usage. You would also have to buy multiple different widths if you wanted to achieve certain looks. With 40% off coupon, I paid $2.99 for this roll.
  • I do not like how you had to spray the whole vase with the sealant. It made the vase seem cloudy. I am not sure of any way around this, other than taping the unglittered areas, which was be a lot of work. 
  • This took some time for me to do. Double sided tape can be frustrating, so it took me about 15 minutes for the one vase. 

Glue Application

I used a wine and beer bottle for this option. Heat bottles in an oven at 350°, for ten minutes. Using oven mitts, remove the labels while bottles are hot. If there is any residue, wait for bottles to cool and clean with a sponge.

Process-

Use painters tape and tape off the area that you want to apply the glitter. Make sure the tape that is bordering the glitter area is completely flat against the glass. Apply Mod Podge generously all over the glitter area. Apply glitter. Press down on the area with your finger to make sure all the glitter is glued down. 


Apply the sealant to the glitter area, make sure to only apply on the glitter and not that area that is bare (without tape). Remove tape immediately. 

Pros:
  • I felt like the coverage was very thick with the glue. 
  • I love that the sealant is only applied to the glitter area, since you can leave the tape on while spray painting. 
  • The whole process was very quick, about 5 minutes start to finish. 
Cons:
  • If you have to purchase the painters tape, this option could be expensive. But in most cases masking tape or package tape would work too. Painters tape will give the most precise line. 
  • My fingers and surrounding areas did get a bit more glitter and glue on them, since I used my fingers to press down the glitter. Using a brush would probably not work with this option because it would take off too much of the glitter. 

Outcome:

Even though I like the clean look of the tape, I think I like the glue application better. I had all the supplies I needed at home, so I would not have had to purchase anything. Some people may find working with painters tape annoying, but I don't mind it and I think it makes a nice line. The craft tape option would be better if there was a way to only apply the sealant to the glitter area, so it wouldn't make the hazy look. So if you know the secret, let me know. They still looked gorgeous and I ended up putting flowers in the vase, so the haziness was a bit hidden.  Obviously these trials happened around Christmas time, and I got so many comments on them throughout the season.


Check back in a few weeks for the BIG project that I was preparing for! I am so excited to share the party with you!

Happy glittering, 


Top Mommy Blogs - Mom Blog Directory

very spidey pumpkins!

I love making Halloween decorations. Particularly ones that I can redecorate after October 31st, and make them more Fall looking to last through Thanksgiving. Usually, when I get the Michael's emails, I look for good coupons and keep scrolling, but recently this craft came along and I knew that Luke and I had to give it a try. 


What you will need:
Hot glue gun
Pumpkin (faux or real)
Little spiders, big spiders, any kind of crawly spiders you want!

Directions:
Hot glue the spiders on the pumpkin. You can do them crawling up the pumpkin or placed all around the pumpkin. We opted for a real pumpkin, the glue stuck, but it definitely was not permanent. This was OK for me, since I want to use the pumpkin after Halloween, but if you want a more durable pumpkin or if you want to place it outside for more than one night, use a faux pumpkin, they will stick better!

Remember, hot glue is very HOT. I had Luke hand me the spiders, I applied the glue and than placed on the pumpkin. This was perfect for him, since he wanted to play with the spiders anyway!


This is the perfect decoration for a front hall or to place on the porch. Super simple and super cute! 

Happy DIY'ing,


october=pumpkin

How in the world is it already October? I feel like my mom when I say, "time moves so fast when you are grown up." But, wow it really does!

October is a HUGE month for me. It is the month of my wedding anniversary (7 years for those wondering), the month of my birthday and most importantly the month that I subject my loved ones to EVERYTHING pumpkin! So, I thought "hey why not subject my readers to the same?" This month I will highlight all of my favorite pumpkin recipes, pumpkin traditions and new pumpkin ideas. 


Some of you may love this and some of you may not be so keen on the whole pumpkin thing. Pumpkin can be an acquired taste, but I promise if you try just one recipe, you will be pleasantly surprised (and no a pumpkin spice latte does not count as trying a recipe). Pumpkin is loaded with vitamin C and potassium and is even said to help with fertility! Nope, there is not hint in that last sentence.


Let the pumpkin madness commence! 


Happily addicted,


big boy future

The day has come! My baby is no longer in his crib, and I am not sure how to feel about it. This age is so much fun, every day is something new and exciting to him. He is almost speaking full sentences and his facial expressions have always been animated, but they have reached a whole new level, lately! 


I did a side table a few weeks back, and let you all know that I had a big project coming up. Well, I had found a toddler bed on a garage sale site, and was immediately drawn to the cheap price and the potential. When we bought the bed, the color was grey, while I love the new grey fad, it just didn't go with his room at all. I ended up going with Olympic - Star Spangled (in satin) for the color. I did not want a nautical blue but still wanted it to go with the decor I already had in his room, so opted for a bit of a deeper blue. I am very happy with how it turned out! 

Luke has been watching me prepare and paint the bed, and has been so anxious to see the finished product. We gave him his new quilt a week ago and let him sleep with it in his crib, to help the transition. Luke LOVES sleep, so needless to say I am a bit nervous to change anything up out of his routine. What if he didn't go to sleep on his own anymore? What if he wasn't excited for the change?  Of course there are days where it takes him a bit to fall asleep for nap, or nights where he is a bit wired, but for the most part he enjoys his sleep time.  

 I used the same method as I did for the side table, using the liquid deglosser. Though I regret using white primer, I feel like it made it mandatory for me to do 3-4 coats of the blue. 

After one coat of the blue. Have y'all seen those handy pour paint lids, invest in one, quickly! 

Also, with our monsoon season, it took FOREVER to dry. It is so important to let the coats dry completely before moving on to the next step. Patience is a virtue, right?!? I did change up the sealant a bit, using a paint on option instead, Valspar Clear Protector. Definitely more time consuming than the spray on, but I like the outcome! 


Here is the bed after the clear sealant coat was added, it took about 2 hours to dry to the touch. 

Sunday was the day, everything was dry and we were motivated to make the change! Luke helped Ryan take apart his crib and the changing table (I know, he hasn't fit on it for like a year, but it was so easy)! He also semi helped to assemble the bed, which made it so fun. Tool belt and all! 


Here is his new room, I really didn't change much except for the bed and added a few more updated pictures, as well as throw pillows. 


Lampshades were a great find from Target, a few years back. Here is a fabulous DIY, to make your own Chevron print lampshades. Seems super simple and fun!

Update!
 We found this giraffe picture at Kirklands, and knew it was the perfect addition for his new room! And it was on sale for $13.00, can't beat that!


Alphabet Mobile is Pottery Barn Kids and unfortunately no longer available. Here is a similar one, and from a small business, so double score!  

We also decided to do an incentive program for him staying in his bed. The kid loves stickers, so we went that route. I made a little sign and hung it on his door, and we told him if he stayed in his bed, than he would get one sticker in the morning and after nap. This morning he was so excited for his car sticker. As I type this, he is happily napping in his big boy bed, anxiously awaiting his car sticker. I hope it has not been a fluke that it has gone so smoothly, but am thankful anyway! 


He was so excited to go to bed Sunday night, it made us so happy and a bit sad too. Growing up is part of life, but I feel so unprepared to see baby lukey (as his friends and cousins call him) grow up. All we can do is hope that we are molding them into good, sincere human beings, and preparing them as best we can for the future. For now, I will still sneak in the cuddles when I can and wait for the next big milestone! 

Happy parenting, 

Meredith 


how about some DIY for your Monday?


Who remembers the show, "Trading Spaces"? I am pretty sure this show was way before DVR's, so my family had many VHS tapes filled with Vern Yip.  My family was obsessed, it was such a fun show to watch together! This brilliant show led to a nationwide take over of home improvement and DIY projects. 


Ever since I was little, I have always been excited to have my very own house.  Everyone loves a good makeover, some like to watch others do it while some like to partake in the fun. I am the latter. I love transforming furniture, and making it my own. Ryan and I got married young, so we were more than happy to accept the hand me downs that both our families gave to us. I confirmed right away if they were expensive family heirlooms or things that I could sand, paint and make over. Luckily I got the green light on most things, and I had such a good time transforming the pieces to match my style.


This is such a great dresser, given to us by friends of the family. It was also my first makeover!

I wanted to share with you one of my recent transformations. We were gifted this by friends who were moving, I immediately saw potential in this sweet little piece. 
This is the piece of furniture before I did anything to it. 


I have never used liquid deglosser. I have a LARGE piece of furniture that I am preparing myself to redo, and I do not want to sand the entire thing, so the kind people at Lowe's informed me that this is just as good as sanding. I was hesitant, but thought I would give it a trial run. 


The instructions say to apply the deglosser, wait at least 30 minutes, but no more than 12 hours. This is more difficult than you think, with a toddler. I somehow McGyvered some time in the morning to start this project, so it would be ready to finish by nap time! 
This is the top of the furniture with the deglosser applied. 


I waited roughly 45 minutes to start applying the first coat of paint. I opted for a white tinted primer/sealer to use on this piece. This particular brand is Valspar, which can be found at Lowe's. It is one of my favorite paints and is also on the cheaper side, so can't complain there.


Here is what it looked like with one coat. I was getting a bit concerned that it would not cover well, but I told myself to stop being so impatient! 


Here it is with two coats, dried. It looked great. There were some small areas that I decided to do three coats on, but for the most part two coats worked well!


That night I sent Ryan and Luke to Lowe's with specific instructions on which sealant to buy. To my surprise they came home with something completely different (not a surprise at all, it happens ALL the time)! It is also Valspar brand,  an easy spray on semi gloss premium finish. My only advice for this step is to do it OUTSIDE, this stuff smells. I did it in the garage, with the door open and my house still stunk! I ended up really liking this product and plan on using it on my future furniture projects, in the end Ryan made a great choice!! 


I was really pleased with how this turned out! I love the color and I love how easy it was to make this over. I think it completely changes the style! 

I have a few more practice pieces to complete, before I tackle my biggest piece yet, Luke's new toddler bed and dresser. It was a great find, but definitely needs to some TLC before we make the transition. 

Stay tuned!

Happy Diy'ing, 
Meredith