Showing posts with label healthy toddler. Show all posts

Freezer Friendly Loaded Mac N' Cheese


This month I am featuring pasta! Even though it is warming up, summer is a great time to stock up your freezer in preparation for busier months. Pasta dishes usually keep 3-4 months in the freezer and they are so easy to store using the foil pans sold at the dollar store. They are some of my favorite freezer meals to accumulate, not only for my family but also to share with other families for meal trains or just to give them a break. 

freezer friendly

 I have featured my plan Mac N' Cheese before, but this one is a meal in itself. It is loaded with meat, vegetables and bread crumbs. I promise it is hearty enough to serve as a main dish. 


Loaded Mac N' Cheese 
Yields: 2 8x8 Pans

Ingredients:

16 oz. uncooked noodles
¼ cup butter 
½ tsp salt 
2 TB of coconut oil 
1 pound of ground beef or turkey
1/2 tsp onion powder 
1 tsp Cajun seasoning 
¼ cup flour 
1 ¾ cup milk
20 oz of cheddar cheese
1 yellow squash chopped
1 zucchini chopped 
1 red bell pepper
½ cup Panko Style Bread Crumbs 

Directions:

Chop all vegetables into small pieces. In a large sauce pan cook the vegetables with a few tablespoons of coconut oil. Once cooked through, place to side. 

Cook the meat in the same sauce pan, until browned. We use beef, but this would be good with chicken or sausage. Combine the meat and vegetables. 

Cook the noodles per package instruction for al dente. You do not want them completely cooked through, as they will be cooking more in the oven. 

Combine noodles with vegetable and meat mixture. 

Have all other ingredients laid out and ready to make the cheese roux. Over medium to high heat, melt butter in large saucepan. Once completely melted add in the flour and mix well. Take pan off of the heat and add in milk, mixing well. Place sauce back on low to medium heat and stir constantly until it thickens. Remove from heat and add in the cheese, leaving a small portion for the topping. 

Combine cheese sauce with noodles, meat and vegetables. Place in greased 8x8 pans. 

For the topping combine remaining cheese and bread crumbs. Place evenly over the different casseroles. 

Cook at 350° for 25-30 minutes until bubbly. Place under broiler for 1-2 minutes to brown the bread crumbs. Serve warm! 


freezer friendly meals

If freezing, let cool completely before freezing. Top with foil and wrap with Saran Wrap to keep from freezer burn. 

If reheating frozen, the cooking time will be 1 hour to 1 hour 15 minutes, covered. Remove cover the last 20 minutes. You can also remove the dish 1-2 days before you are reheating to allow time to thaw. 


Your family will love this dish and trust me, it is the perfect freezer meal!! 
Next week I am sharing a money saving tip that you will LOVE to have in your freezer. Stay tuned! 

Happy freezing, 


Vote For Me @ The Top Mommy Blogs Directory Vote For Me @ The Top Mommy Blogs Directory


Happy National Pecan Day!


It's National Pecan Day! I have decided it would be fun to celebrate one random holiday a month, so maybe it will be National Pizza Day or National Wear Blue Day, whatever it is we will be celebrating here a few times a month. 
Did you know that pecan trees are are native to North America? Over 80% of our pecans come from American soil (source). Pretty cool, huh? Pecans grow amazingly well here in southwest Arizona and we have a large Pecan farm right near us. 

Pecan lovers

Today I am bringing you an amazing chicken finger recipe. Anytime you add pecans to something, it immediately takes it up a notch, and these chicken fingers definitely apply to that. This recipe is super easy and uses a simple egg wash breading technique. You won't be disappointed!

pecan chicken recipes

Pecan Crusted Chicken Fingers
Yields 5-6 Chicken Fingers

Ingredients:

5-6 pieces of chicken 
2 cups finely chopped pecans
1 cup panko 
½ t salt
½ t paprika 
½ cup flour 
2 eggs, well beaten 
Directions:

Preheat oven to 350°

Cut and trim the excess fat off your chicken. I usually buy chicken breast and cut them to size, usually a bit cheaper than buying the chicken fingers pre-cut. Pat them dry and set aside. 

Set out three large bowls. In one bowl add in the flour, in the second bowl crack your eggs and lightly whisk them. Lastly, add in all remaining ingredients to the third bowl and mix well. 

 Place chicken finger in flour mixture and cover. Dip in egg wash and coat well. Lastly, dip in the pecan mixture and lay flat on a cookie sheet. For easier clean up make sure to use parchment paper on your cookie sheet. 

Cook at 350° for 25-30 minutes until they are a nice golden brown and cooked through. 

Enjoy!


pecan recipes


Happy National Pecan Day!! 


Vote For Me @ The Top Mommy Blogs Directory Vote For Me @ The Top Mommy Blogs Directory

quinoa fried rice

#freezerlovefriday is usually a breakfast or a dinner recipe, so today I thought I would offer up a lunch idea. Luke and I are typically running around all morning, either at the gym or running errands so when we come home for lunch we need something quick and easy! 


I came up with Quinoa Fried Rice one day when I had made WAY too much quinoa the night before. I love fried rice, but hate spending the extra $2 to add it to my meal and the extra calories are no bueno either. This comes out with a bit of crunchiness to it (thanks to the bread crumbs) and is loaded with veggies. We love ours topped with eggs, but the possibilities are limitless with what you could top with. This is a vegetarian recipe, but I think sausage or ground turkey would be great with this! 


Quinoa Fried Rice 

Ingredients:
2 cups quinoa 
1 ½ cup bread crumbs
½ cup mixture of thinly cut squash and zucchini
1 can of black beans (you can use ½ a can if you aren't big on beans)
2 cloves of garlic, minced
Half of an onion, chopped
**Everything from here up is what you can freeze in a large Ziploc bag! 
1 egg
3 tbsp EVOO or coconut oil 
Pinch of salt and pepper 

Optional Toppings:
Fried Egg
Scrambled Eggs
Avocado 

Directions:
Prepare your quinoa per package directions and let sit 10 minutes. 

In a large bowl mix together prepared quinoa, bread crumbs, veggies, black beans, garlic and salt/pepper. 

Scramble the one egg in a separate bowl. Once scrambled add to the quinoa and mix well. 

Heat the EVOO or coconut oil in your cast iron skillet at medium to high heat. 

Once oil is hot, add in your quinoa mix. Mix occasionally and wait for the quinoa to slightly brown. 

Serve under a fried egg or avocado and enjoy hot! 


Luke's lunch serving with scrambled eggs! 
Freezing Instructions:
Make sure it completely cools before adding to a large Ziploc bag. 
It freezes nicely laying flat in your freezer. You can also freeze a few lunch size portions in small Ziploc baggies and have them ready to go for any day. 


Reheating:
You don't necessarily have to let the quinoa mix thaw before adding to the cast iron skillet. If you are cooking it frozen, wait until it is thaw in the skillet to add the scrambled egg. It takes roughly 5-7 minutes to cook frozen! We will typically bring the quinoa mix out of the freezer the morning of and have it thaw while we are out running errands.

Happy freezing, 


If you like what you just read please click to send a quick vote for me on Top Mommy Blogs- The best mommy blog directory featuring top mom bloggers


LPN is 3!

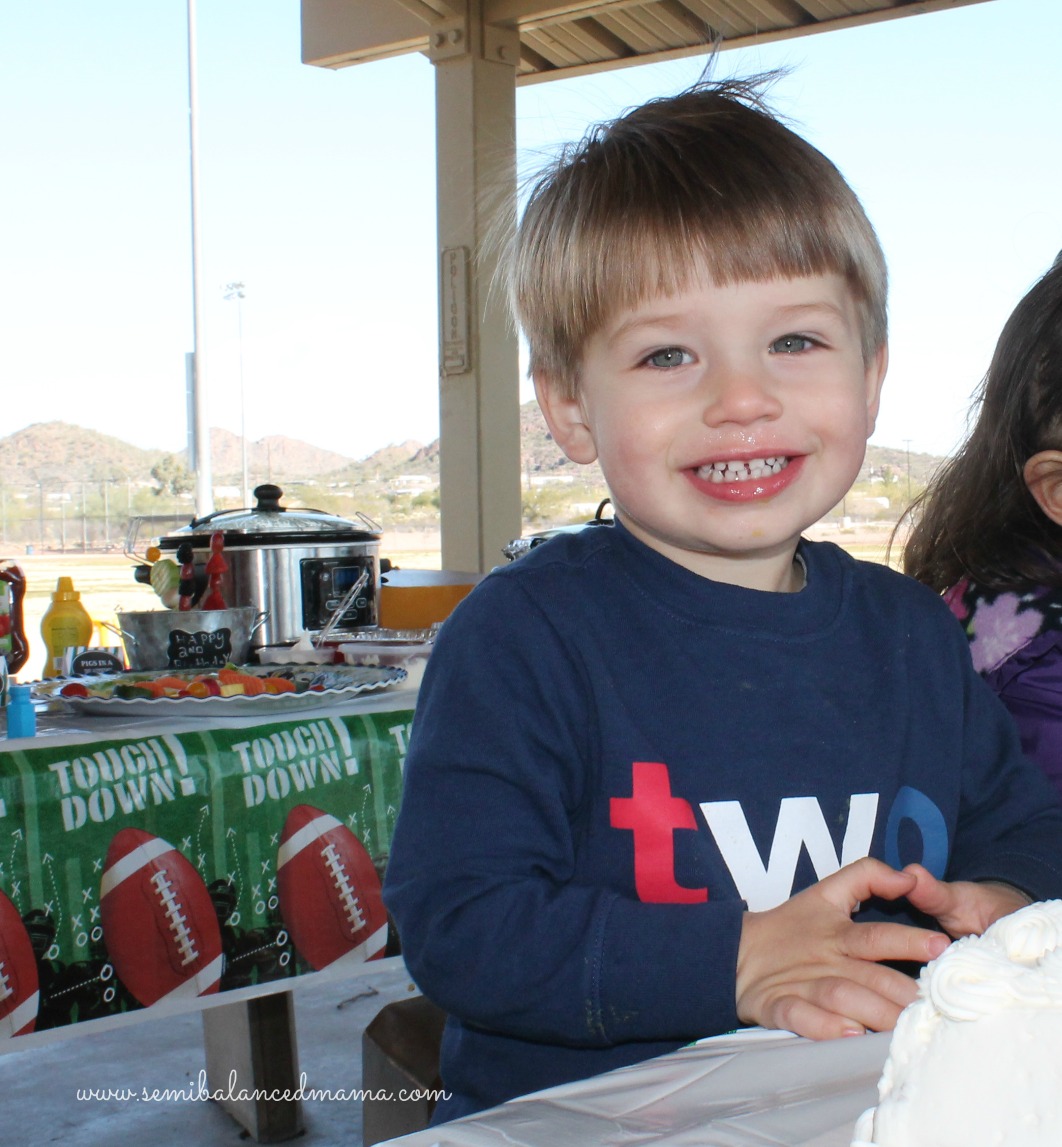
Our sweet boy turns 3 today! Where do I even begin? Baby Luke (his favorite nickname among family and friends) is no longer a baby. I swear there are days when he comes bounding down the stairs and I think he is off to High School. 

Birth Day 1/10/2013
 He loves basketball, hockey and football. 
He love backhoes, tractors and fire trucks.
His favorite book is "Daniel Tiger - Christmas". 
His favorite show is hands down Daniel Tiger. 
He didn't really start watching TV until 3 months ago, and we can thank the YouTube channel, Blippi, for that. 
He sleeps with no less than 10 stuffed animals, Ty (or Thomas) the teddy bear is his favorite. He is a wonderful sleeper, who can get quite cranky if he does not get his 15 hours of sleep a day. 
He basically potty trained himself a few weeks ago, with a little persuasion from his Daddy and his Nonnie. 
He was never a big snuggler until the last deployment, when he became the best snuggler! His favorite saying is, "Holy Moly," thanks to his Aunt RaRa. 
He can be shy, bashful and a bit slow to be the class clown but once he opens up he loves to make people laugh. 
My heart melts every time he says, "Thank you Mommy," and the best compliment you can give me is that he is a polite little boy.  
On any given day he asks WHYYYY  at least 45 times, sometimes he gets an answer sometimes he doesn't!
He loves to help Mommy clean and his face lights up when Daddy gets home from work.
He is an avid traveler, over 25 flights and counting!
His favorite food is Broccoli (no seriously, I just asked him). I would say he also really loves chicken nuggets, but the kid knows what he wants. 

1st Birthday! - Color theme 

2nd Birthday - Sports Theme 
Luke was the perfect addition to our family, and we are so very thankful that God decided to bring him to us. His love and passion for life make every day an adventure, and I can't imagine having any other job than being his mommy. I never saw myself as a SAHM, but now I am so very thankful that we made that decision. Going down to one income was a huge decision for us, and one that we did not take lightly, we knew we would have to make sacrifices. Of course we have our not so great days and yes, there are certain things about the professional life that I miss, but ultimately this was the best decision for our family. Life is good, God is good and we are making sure to cherish every day. 


Every other year we celebrate Christmas with my family at our house, and this year was a year that we stayed in AZ. Back in 2013, I threw Luke's 1st birthday in December while everyone was at the house, so I thought it would be fun to throw a small 3rd birthday party for Luke this year.  His birthday theme was a no brainer, the kid is obsessed with all things construction, so we went with it.


My birthday is right around Halloween, so when I was growing up my mom always made a theme cake for me. Whether she would do a ghost cake or a graveyard cake, it was always so special to me. So, this year I tackled a construction cake. I must say it was very tasty and the look on Luke's face was SO worth it. 


 It was so much fun to see him play with his friends and with his cousins. Such a special treat for him. He was slightly confused why we celebrated his birthday for 2 weeks, but hey you're only a kid once!


We have always visited The Arizona-Sonora Desert Museum on Luke's actual birthday. This year we continued the tradition and even captured a similar moment. 


Happy birthday, Luke! 
May you always look at the world through a smile. We love you!!!


If you like what you just read please click to send a quick vote for me on Top Mommy Blogs- The best mommy blog directory featuring top mom bloggers

#freezerlovefriday is BACK

#freezerlovefriday has been on the blog since the beginning, and I have loved bringing these recipes to you all. One of the most popular posts was my breakfast burritos recipe, and it was amazing receiving feedback and pictures from people who made them for their family. Whether you are a working family, a student, or a stay at home parent family, having something to grab and throw in the freezer can be so helpful. 


As promised, I am changing it up a bit this year. I am going to pick one main ingredient a month and give you a few different recipes for that one ingredient, ranging from breakfast to dinner. If you don't love the ingredient of the month, try out at least one of the recipes. As my cousin's children taught us, "try one no thank you bite!" You may be surprised and love it. Or just come back next month for the next ingredient!


Introducing January's ingredient of the month, Quinoa! I have blogged about my love for this super food before, but I am here to tell you there is SO much more you can do with quinoa than just serve it as a side. I am starting out with an easy and hearty recipe, my very own Broccoli Quinoa Bake. This is perfect for a cold day, and is loaded with veggies and goodness. 


Broccoli Quinoa Bake 
This is super easy to double. Enjoy one the night of and freeze one for later! 

Ingredients:
1-2 chicken breasts (this can be made without, as a vegetarian option)
1½ cups uncooked quinoa
2 cup chicken or vegetable stock
2 tbsp coconut oil
1 cup water
3 cups mozzarella
1 cups cheddar
1 cup Parmesan 
3 pinches of salt
1 tsp corn starch
3 cloves of garlic, minced
3 cups of broccoli florets
2 cups spinach

Directions:
Preheat oven to 400º

Cut the chicken into small pieces. Melt coconut oil in a saucepan and cook the chicken through, set aside. 

Lightly grease an 8X8 baking pan.

Add the dry quinoa and cooked chicken into the greased baking pan.

Combine broth, water, salt, and corn starch (used to thicken up the sauce a bit) into a saucepan. Stir occasionally and bring to a boil. 

Let boil for 3 minutes and add to the quinoa and chicken.

Add in half of the cheese and most of the Parmesan, saving about ¼ a cup, mix all ingredients. 

Bake for 35-40 minutes. 

While that is cooking, steam the broccoli. Either microwave for 3-5 minutes or steam on stove top for 5-6 minutes. 

The quinoa should be fully cooked by 35-40 minutes. Remove from oven, add in the broccoli, mix well. Top with remaining cheese, panko bread crumbs and Parmesan cheese.

Broil on low for 3-4 minutes, until golden brown. 

Serve immediately! 


Freezer option:

Cook (do everything except the broil stage, you can brown the top when reheating) and let cool completely. Cover in foil, and than wrap the entire pan in Saran Wrap (this will help protect from freezer burn. 


Example of freezer prep!
You can thaw and than bake (about 30 min at 350º) or you can reheat frozen (1 hour to 1.5 hours at 350º)!
Don't forget to label and include instructions. 

Love it? Don't forget to pin, share or tweet for future reference! 


Have an ingredient that you would like to see featured, email me or comment! I love hearing from you! 

Happy freezing, 


If you like what you just read please click to send a quick vote for me on Top Mommy Blogs- The best mommy blog directory featuring top mom bloggers

#freezerlovefriday breakfast series

Muffins! Who doesn't love muffins? I find they are the perfect grab n' go snack to give to Luke (and myself)! The type of muffins you can make are endless! They also freeze extremely well. 


I chose the classic blueberry muffin for our second breakfast #freezerlovefriday post! I LOVE blueberries and I love that you can get them year round for relatively cheap, hello frozen aisle section. I picked up a bag of frozen, organic blueberries for $0.99 at the Dollar Store, the other day. They have an amazing frozen food section, and so much of it is organic! This is an easy and yummy recipe that is sure to please the little and big stomachs in your house. 

Ingredients:
1 cup butter, melted
1 cup white sugar 
¼ cup brown sugar 
2 eggs, room temperature
1 cup milk, room temperature
1 t vanilla 
1/2 t salt
1 t baking powder
3 cups flour (white or wheat flour, as always I used wheat in the muffins pictured)
2 cups blueberries (frozen or fresh) 

Directions:
Preheat oven to 400°
Add butter and sugars into an electric mixer, mix until well incorporated

Add vanilla and eggs, mix well 

Combine flour, baking powder and salt in a seperate bowl, mix well 

Slowly add in flour and milk to the mixer and mix all ingredients until just incorporated, careful not to over beat. 

Fold in blueberries 

Line muffin pan with liners, drop in batter to just below the top of the foil. These will not rise much, so depending on how large you want them, is how you would fill them. 

This is a super fun activity to get the kids involved!

Bake 23-26 minutes, checking to see no batter comes out when inserting a toothpick. Place on wire rack to cool. 


Enjoy!

Freezing instructions:

Similar to the pancakes you will want to pre-freeze these. Wait until completely cooled, place on cookie sheet and leave them in freezer for at least 6 hours. Once frozen, add them to individual bags or to one large freezer bag. 


Reheat: 
Place in microwave for 45 seconds or until completely heard through.
OR 
Place in oven or toaster at 350 for 10-12 minutes. 

With all of these #freezerlovefriday recipes, my freezer can get a bit crowded! I am your typical Type A who loves an organized freezer. There are plastic bins that are the perfect size for ziplock baggies, so I have a bunch lined up in my freezer. Hope this helps to keep you organized!


Happy freezing, 


#freezerlovefriday breakfast series

Summer is almost over! For our family it doesn't mean a huge change, since Lucas is not in school, but it does mean the return of school traffic and an emptier child watch at the gym! Mornings can be hectic in our house and if I don't have a good option for Ryan to grab and go, he doesn't eat breakfast. You MUST have your wheaties, if you want to have a good day, right? I am more of a "must have my coffee, before talkie," kinda girl, but we all must eat!


I thought I would do a few weeks of breakfast #freezerlovefriday to help everyone make the transition. My breakfast burrito post was such a hit, so I know these posts will help some of you. 

The first breakfast in the series will be pancakes!! We love pancakes in this house, but we don't always have the time to make a fresh batch. I have found the easiest thing to do is to make pancakes for dinner (I LOVE breakfast for dinner) and double the recipe, this way we have plenty of time to make a big batch and freeze the leftovers. These are super simple for Ryan to take to work and for Luke and I to heat up on a busy morning.


This is a pancake from scratch recipe, you will never go back to the packaged ones after this. It is simple and if you bake (even once a year) you should have all ingredients in your pantry. 

Ingredients:

1 ½ cup whole wheat flour
3 ½ t baking powder
1 t salt 
¼ t cinnamon 
1 t vanilla
1 TB white sugar
1 ½ cup cup milk
1 egg
3 TB melted butter 

Directions:

Heat skillet on medium to high heat. Make sure to use Pam or some other nonstick. 

In a large bowl, combine flour, sugar, cinnamon, baking powder and salt. Mix well. Add milk, egg, vanilla and melted butter into the bowl. Mix all ingredients until well combined. 


You can add anything you like to spice up the pancakes. We love banana pancakes (the song as much as the food), and blueberry pancakes. 

Using a 1/4 measure cup, drop pancake mix onto a preheated skillet. Wait till the batter bubbles and flip. Once completely cool, remove and keep warm until serving time. 


Cook all of your batter, eat some and set some aside to cool in order to freeze for later! 
We love using Agave in the Raw as a substitute for syrup! In fact, Luke has only had real syrup a handful of times. It has just enough sweetness and doesn't have as much sugar. Of course, syrup is always good too! 


Ok, now for the freezing. It has a few more steps than the typical #freezerlovefriday post. The idea is to keep the freshness and keep it simple to grab n' go. 
Remember, you should double this recipe if you are wanting to freeze. 

Step 1:
Layer a baking sheet with parchment paper. Place completely cooled pancakes on the sheet, single layered. If doing more than one layer make sure to separate with parchment paper. Cover with parchment paper and place in freezer for at least 6 hours. We do it overnight, but no longer. 

No those aren't burnt pancakes, I LOVE adding my vegan chocolate shakeology to banana pancakes. So yummy! 

Step 2:
Remove from freezer once completely frozen and place in plastic bags. I will typically do 2-3 a bag, since I rarely heat one at a time. 


Reheating options :
Remove from bag and microwave on a safe plate for 1.5 to 2 minutes. It is completely OK to stack the pancakes while microwaving. 

Preheat toaster oven or oven to 350. Line a baking sheet with parchment paper and cook for 10-15 minutes, until pancakes are heated through. 

That is it! You have a very easy grab n' go breakfast option for your family. Let me know if you try this out and what you added to your pancakes. 
Look for more breakfast #freezerlovefriday posts in the coming weeks and let me know if there is anything else you want to see!


Happy freezing,